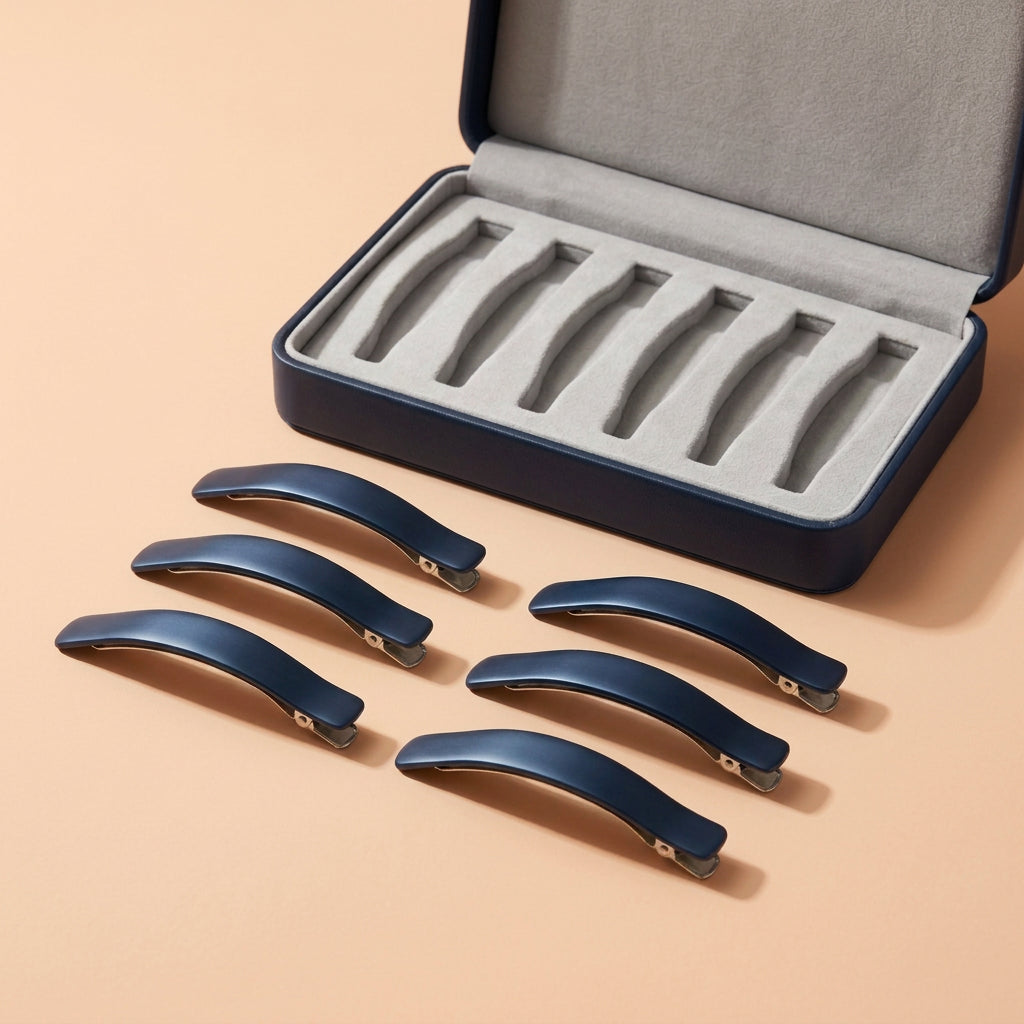
Sculpted Wave-Setting Clip Set in Ocean Navy with Six Curved Clips and a Fitted Lined Case
Sculpted Wave-Setting Clip Set in Ocean Navy with Six Curved Clips and a Fitted Lined Case
Couldn't load pickup availability

Sculpted Wave-Setting Clip Set in Ocean Navy with Six Curved Clips and a Fitted Lined Case
🌀 Six Curved Forms. One Considered Styling Collection.
Deep ocean navy on the outside, pale lining within, a quiet silver-tone detail at each fastening. The Sculpted Wave-Setting Clip Set brings a graphic sense of order to the dressing table. Open the case and the six matching pieces have a place of their own. Take one out and the long, gently arched outline becomes the focus.
This is a collection for someone who enjoys the arrangement as well as the result: planning where a section will sit, placing a clip with care and releasing it without rushing. The design takes a familiar manual styling accessory and gives it a coordinated, restrained presentation, without printed branding or an excess of decorative trim.

The Collection at a Glance
- Six matching navy curved clips, rather than a mixed selection of unrelated shapes.
- A smooth, elongated upper shell with a visible silver-tone fastening underneath.
- A matching navy case with a pale lined interior and six individual fitted positions.
- A manual accessory format with no electrical connection or built-in heating element.
The long upper curve gives each clip a particular visual rhythm. When the set is arranged together, the repetition is part of its appeal. The silver-tone fastening introduces a functional contrast against the darker top without turning the piece into jewelry. The case continues the same idea: a strong exterior color and a light interior that makes the contents easy to see.
Read the Clip Before You Place It
Look at where the curved shell meets the fastening, then open and close one clip in your hand before bringing it to the hair. Notice the direction in which it opens and the area that will contact the section. This small check helps you position the tool intentionally rather than pressing the closed accessory against the hair and trying to push strands into it.
When a clip is open, keep fingers clear of the closing area. Guide the hair into position, then release the fastening gradually. If the clip feels as though it is pulling at the roots or catching a few strands separately from the main section, open it again and reposition it. Comfort is a more useful guide than forcing an arrangement to look perfectly symmetrical.
From a Styling Idea to an Actual Placement
Begin by deciding what you want to hold in place temporarily. That may be a shaped area near a side parting or a section you have arranged as part of a wave-setting routine. The clips are accessories within that process; they are not heated curlers and do not create a permanent wave by themselves.
Prepare the hair with your preferred method before adding the first clip. Work in a mirror and choose a section you can see clearly. If you use separate styling products, follow their own directions rather than assuming the clips change how those products should be used. Start with one placement and assess it before adding more.
The Placement Sequence
- Shape the section first. Arrange the hair in the direction you intend it to sit. Avoid using the clip itself to drag a large, disordered section into position.
- Open, then place. Bring the open clip to the chosen area, keeping it clear of the scalp and positioning the hair without sharp pulling.
- Release and check. Close the fastening gently and see whether the section feels comfortable. Look for stray strands caught near the hinge.
- Add only what is useful. Repeat where another placement is needed. Having six matching clips does not mean all six have to be used in one area.
- Remove deliberately. Open each clip fully before lifting it away. Support the section if needed and avoid sliding a closed clip along the hair.

Spacing Is a Styling Decision
Closely placed clips and widely spaced clips create different arrangements to work with, but neither spacing guarantees a particular wave or level of hold. Begin with the shape you have prepared and place a clip where temporary control is useful. Leave enough room that neighboring fastenings are not pressing into one another or making removal awkward.
For finer or shorter sections, begin with less hair and check that the placement is comfortable. For dense or longer hair, work in smaller areas rather than loading a clip beyond what it can close around naturally. If a section slips, rework its size or placement; do not compensate by pulling more tightly at the roots.
What to Expect from a Manual Setting Accessory
Your hair's starting texture, its preparation, the shape you arrange and any separately chosen styling products all influence the finished appearance. The clips provide temporary placement as part of that routine. They do not promise a permanent curl, a fixed setting time or an identical result on every wearer.
They are also not a substitute for learning the direction of a wave or how your own layers fall. A useful first session can be as simple as practicing two or three comfortable placements near a parting, then removing them carefully and noting what you would change. Develop the arrangement gradually rather than treating every attempt as a complete finished style.

The Case Is Part of the Routine
The matching navy case opens to a pale lined interior with six fitted positions. Count the clips back in after styling so you are not searching for the last one the next time you get ready. Place each piece in its own recess rather than piling several over one slot, and avoid closing the lid against a clip that is sitting at an angle.
The presentation is deliberately plain and unbranded. Its appeal comes from the contrast between navy and pale lining, the repetition of the six shapes and the way the pieces sit together. It works as a considered gift presentation without adding decorative objects that have no role in the styling set.
Aftercare in Small, Specific Steps
Check each fastening for loose hair after use. Remove strands gently rather than pulling them against the hinge. Wipe away ordinary surface residue with a soft cloth, avoid abrasive pads and let the clips dry before returning them to the lined case. Do not force the mechanism beyond its normal movement or leave the set pressed against hot styling surfaces.
Before You Close the Lid
Your complete set: six matching navy curved wave-setting clips and one fitted lined case. Lifestyle images may show only some clips in use; the included quantity remains six. Brushes, combs, hair products and countertop props are not included.
Are they heated? No. Must I use every clip at once? No; choose the number that suits the arrangement. Will they guarantee an all-day wave? No fixed duration is promised. Choose the collection for its coordinated design and the deliberate, hands-on styling process it supports.